Image Editing |
Not sure why it took me quite a few attempts, but I finally figured out the edge refine feature, combined with a few extra layers for those stubborn final hairs. Tward has a nice video that got me almost home, and I combined it watching advanced hair masking with the dude from PTC, Photoshop Training Channel
This is my most photogenic Golden, Becka, just the head-shot for now.
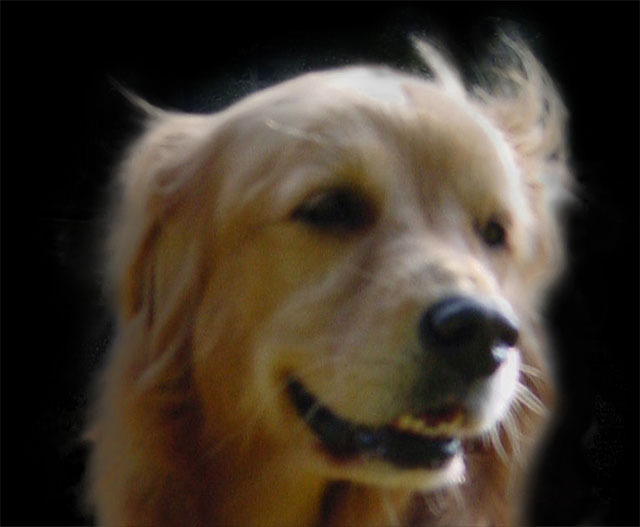
Image Editing |
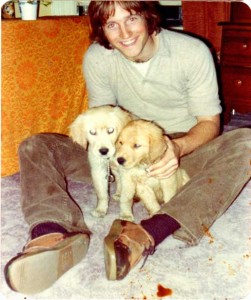
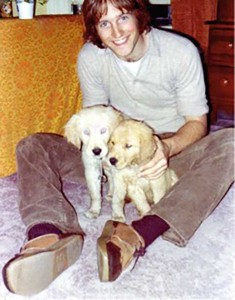
Finding some flawed photos was time consuming, you know, a trip down memory lane. I ran into two problems that I’ll need to improve on. In Photo 1, the dog on the left had total white eye. For expediency, I used a fast-paced fill-in re-creation that I drew while looking at my current Golden Retriever. In photo2, the photo was grainy and when I cloned the sky to replace my thumb I needed to blend parts of the sky. Not as easy as it looks, although there is probably a better way.
1 – Before and After
2 – Before and After
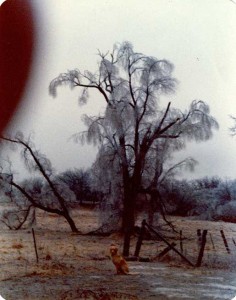
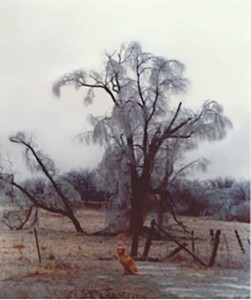
Image Editing |
In the past few weeks I’ve learned several new techniques about selection, masking and adjustment layers. This week the focus was on photo restoration. I think the materials that Deke presents are fabulous. I still like to supplement my reference are with traditional resources. I added these two well-rated books to my library, and will be leveraging both for this week’s photo restoration assignment.

Web Internship |
Kowata Tree. I was still trying to get some web development time in, even though it might be a little premature based on some of the business complexities. So, since he was OK letting me go down this path, we discussed the sort of images that would be best for the site, and what new photos or videos might be needed. Knowing the 360 degree photo shoot was in the near future, I scoped out a studio rental and made a reservation.
Shifting gears back to site development, I figured that I could proceed, using existing content just to make some progress for discussion purposes. I created a MAMP environment, created a child theme, installed WP and plugins, and configured auto backups. I cleaned up some of the existing photos deemed to be useful going ahead, and then created some WP pages as I explored this theme’s features.
I uploaded existing content to the WP library, and created a new header from bits of the old web site using my Photoshop skills. I had some challenge with the menus laying out right, but worked through it. Then, it was time to finally load the web360rotate viewer plugin. I used some demo images supplied by that company, and met with the client yesterday to show him the 360rotate feature as part of WordPress and review some sliders for preference.
I went into the shop this morning to make the carousel for the photoshoot that I have arranged for this coming Monday.
Image Editing |
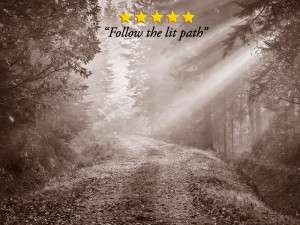
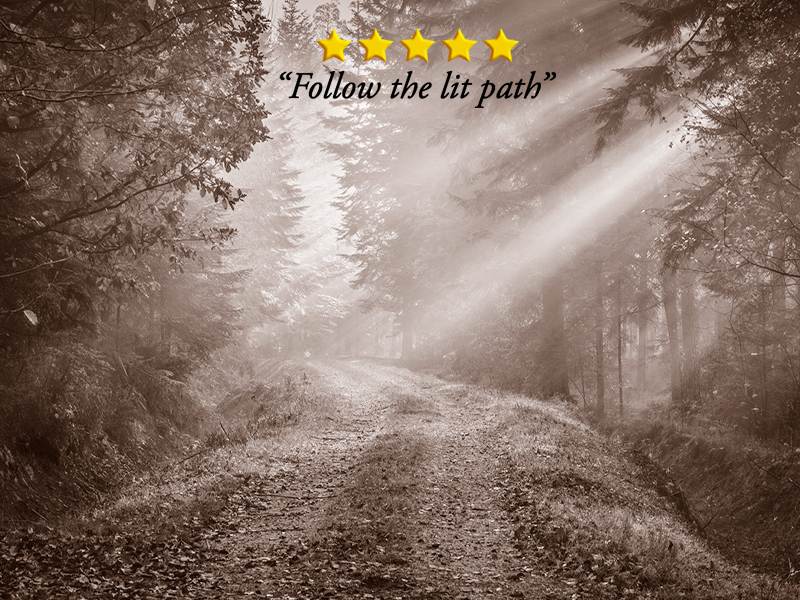
For LP4, I took a nice rural, back-roads free photo, and converted it to duotone. Very easy to implement duotones, but you must have a totally unsaturated, b/w, monochrome image to make this work. The easy to follow example I used was from
http://www.tipsquirrel.com/creating-a-duotone-image-in-photoshop/
I like a brownish, magenta-ish look. Gives it that retro feel. I was amazed to see how many profiles for duo and tri-tones exist in the PhotoShop library.
I tried adding a title and some gold stars to give it some motivational feel, discovering that adding text or embedding another image into the duotone image.psd, resulted in those additions becoming duotone also.
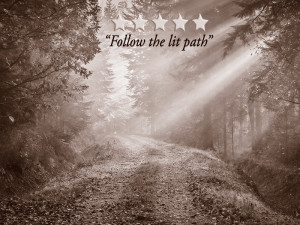
To work around this, I saved the .psd to .jpg, thereby flattening it. Then, I placed another .jpg file with the stars and text that were colorized and the two coexist, displaying both duotone and rgb properties.

Recent Comments